In this post we are going to review step by step on how to create the API code, get it activated and where to add it in order to get the Google Maps working on your website.
- First thing you would need to do is to login with your google credentials or create a new account by following this link https://code.google.com/apis/console
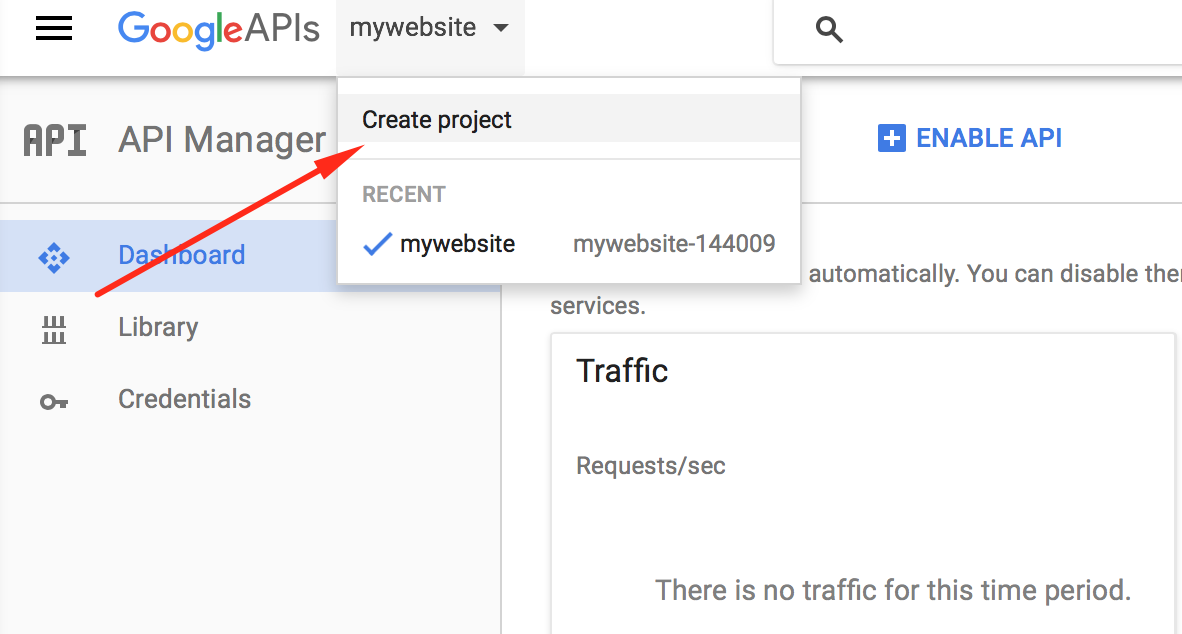
- Once you logged in you need to create a new project (you can use any name for it but we would recommend you to use your website domain name like yourwebsite.com since you might create more projects for your other websites and for different purposes).
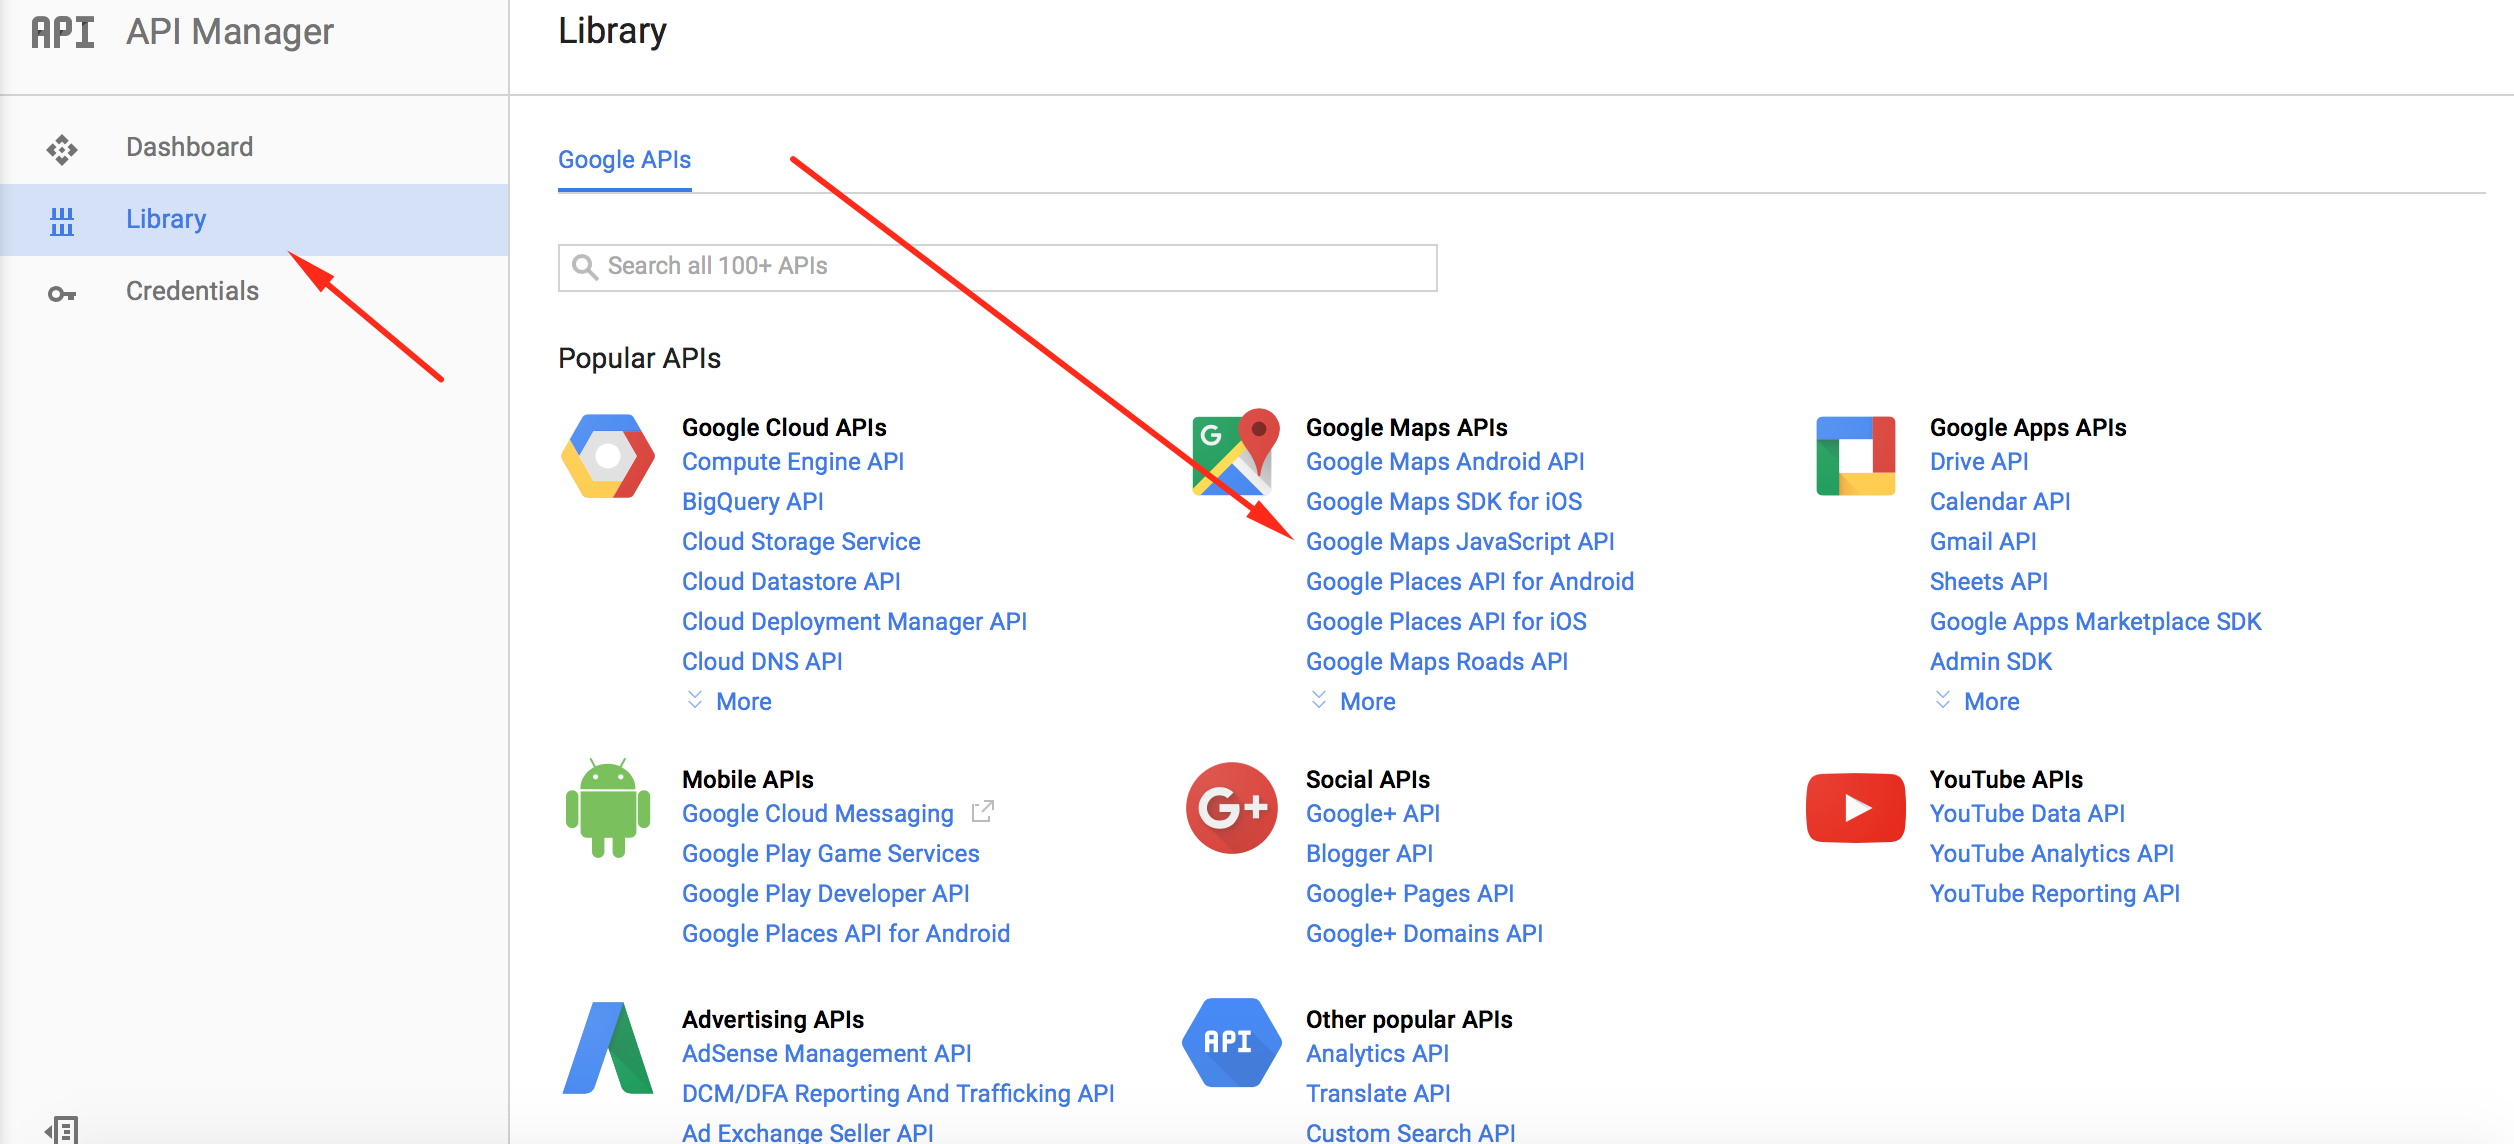
- After you created a project go to library section. This section includes all of the APis that could be used, but specifically for Google maps we would need to use Google Maps JavaScript API
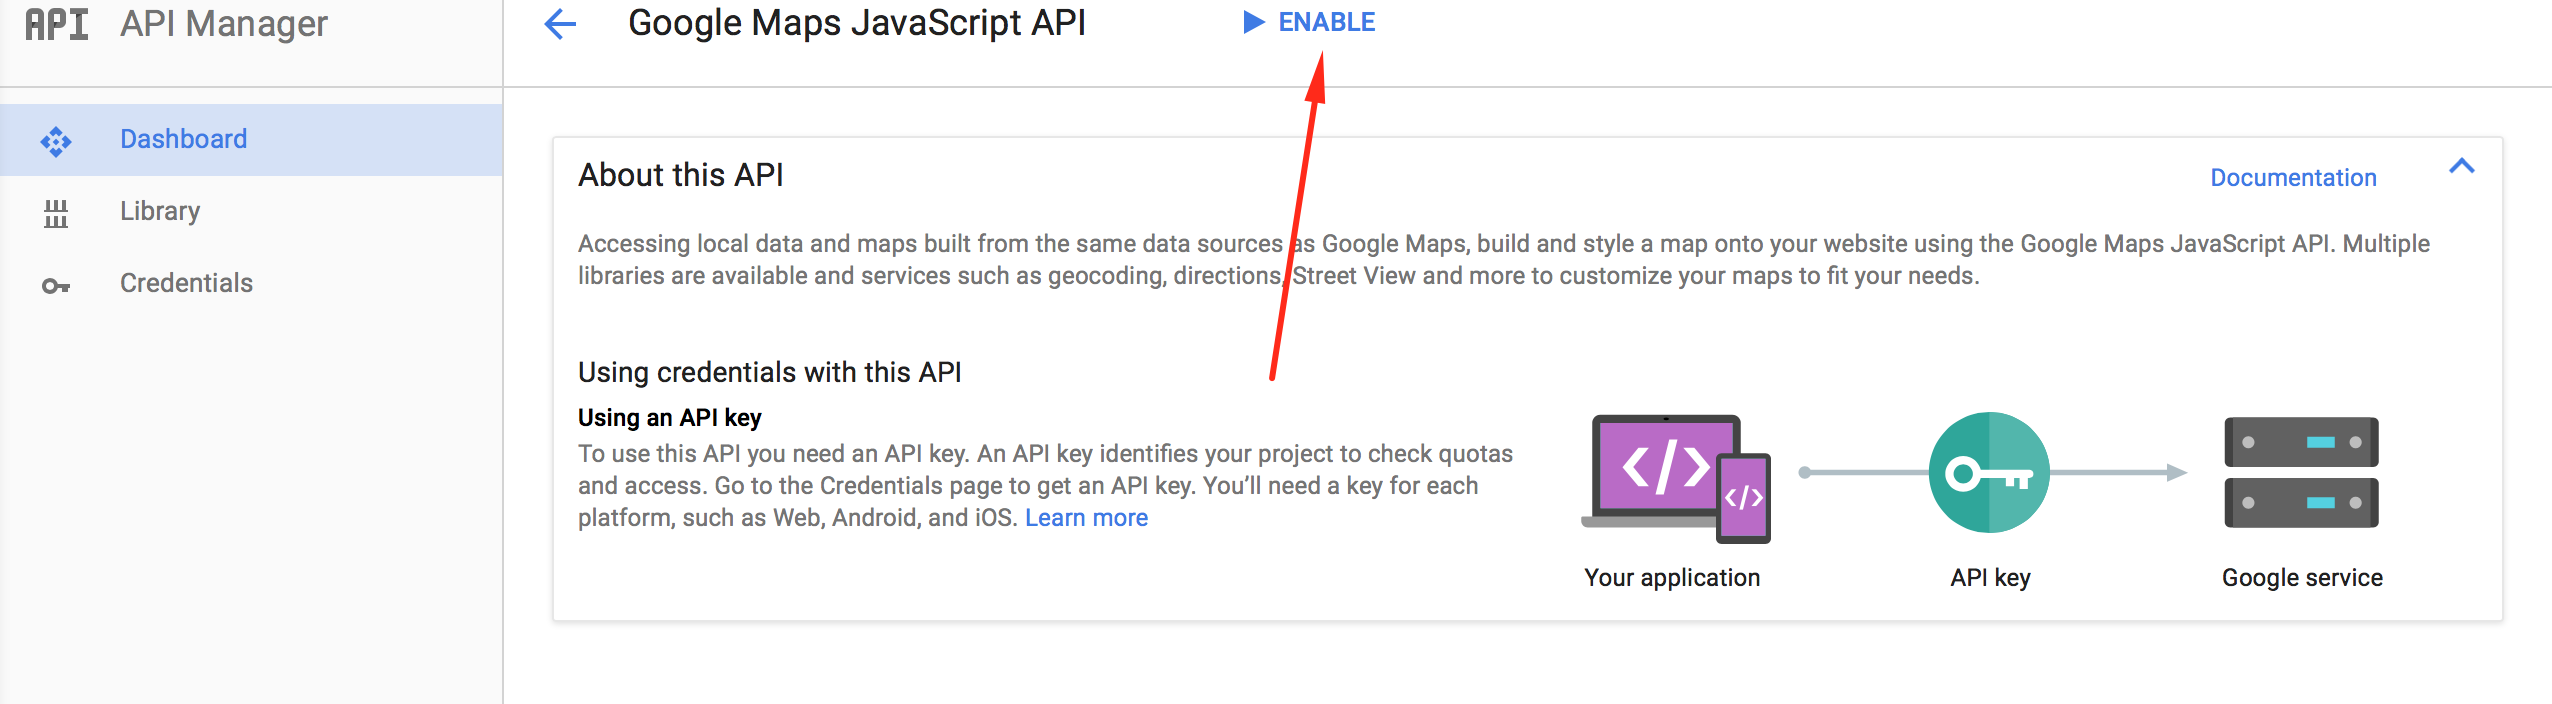
 So lets enable it, you just need to select it from the list and on the next page click enable button
- Once you enabled it you should get the following notification which guides us to create a credentials where we would be able to get the actual API Key which will be used on your website.
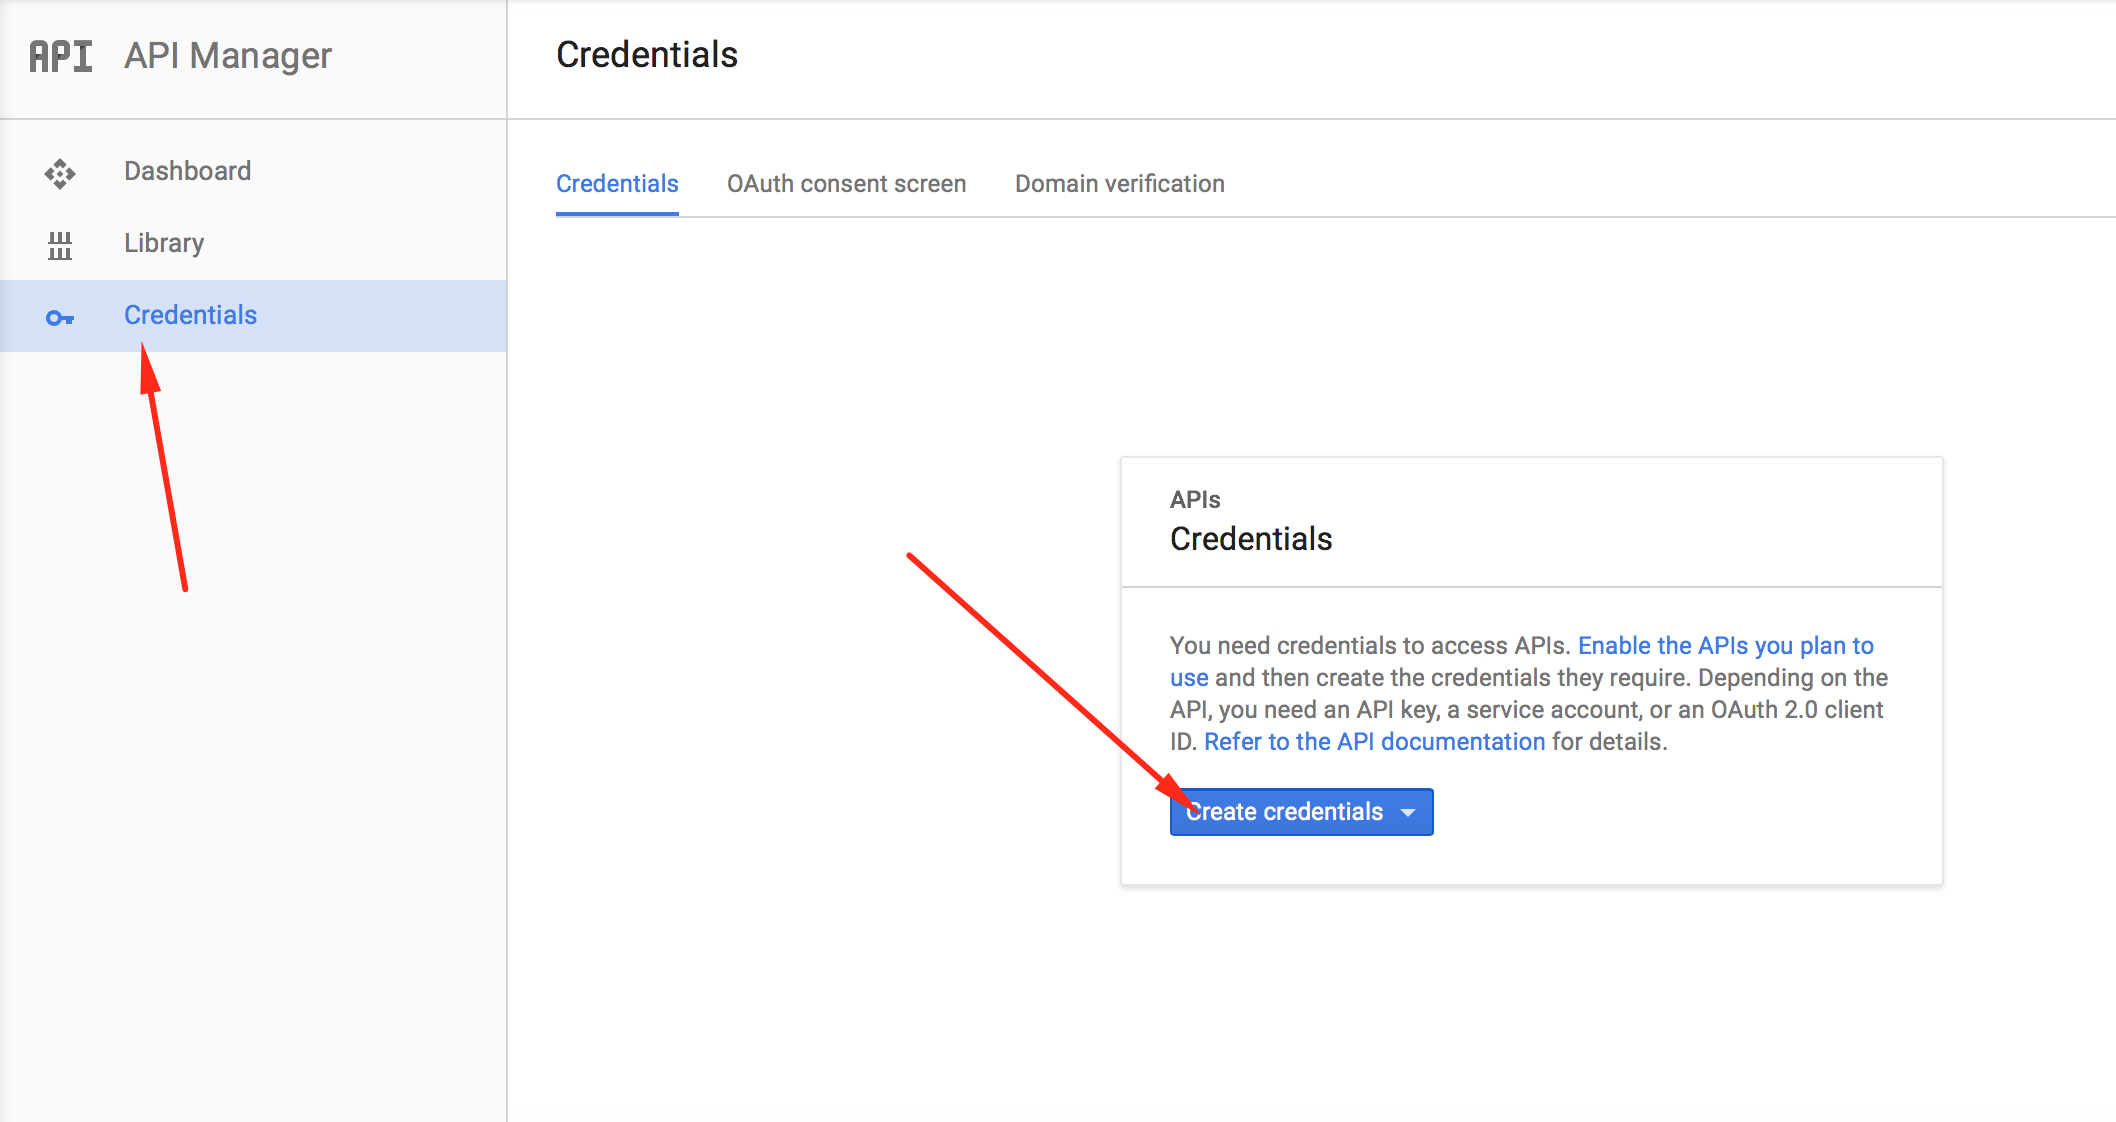
 Now lets go to the credentials section, where you need to click the “Create Credentials” button
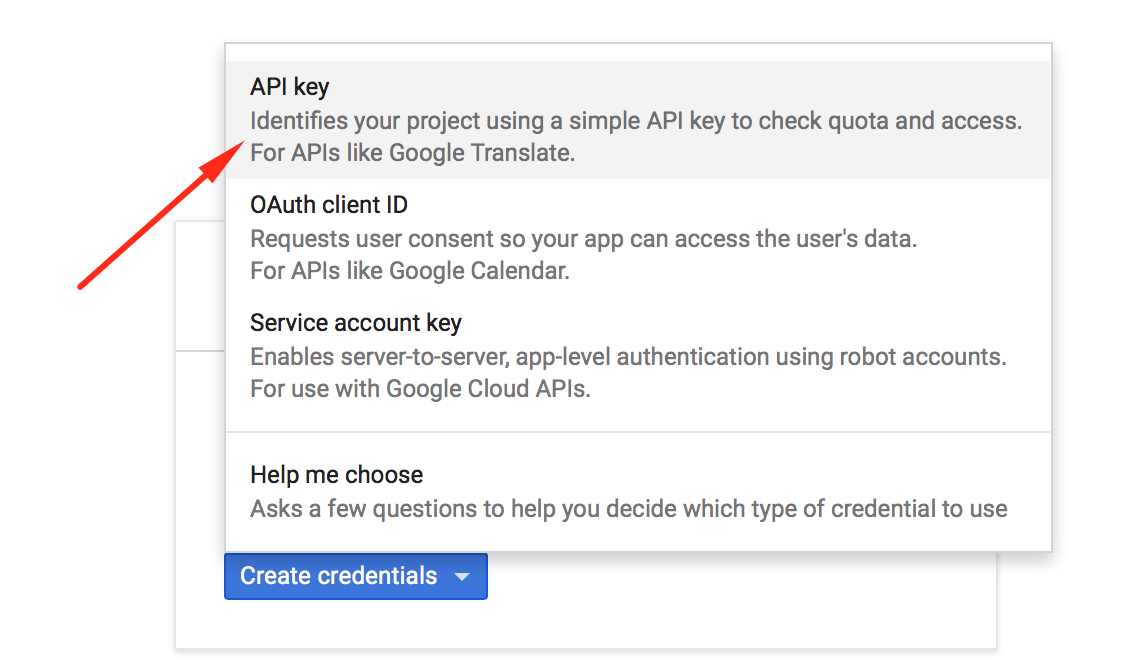
 In the Popup you need click on the API KEY
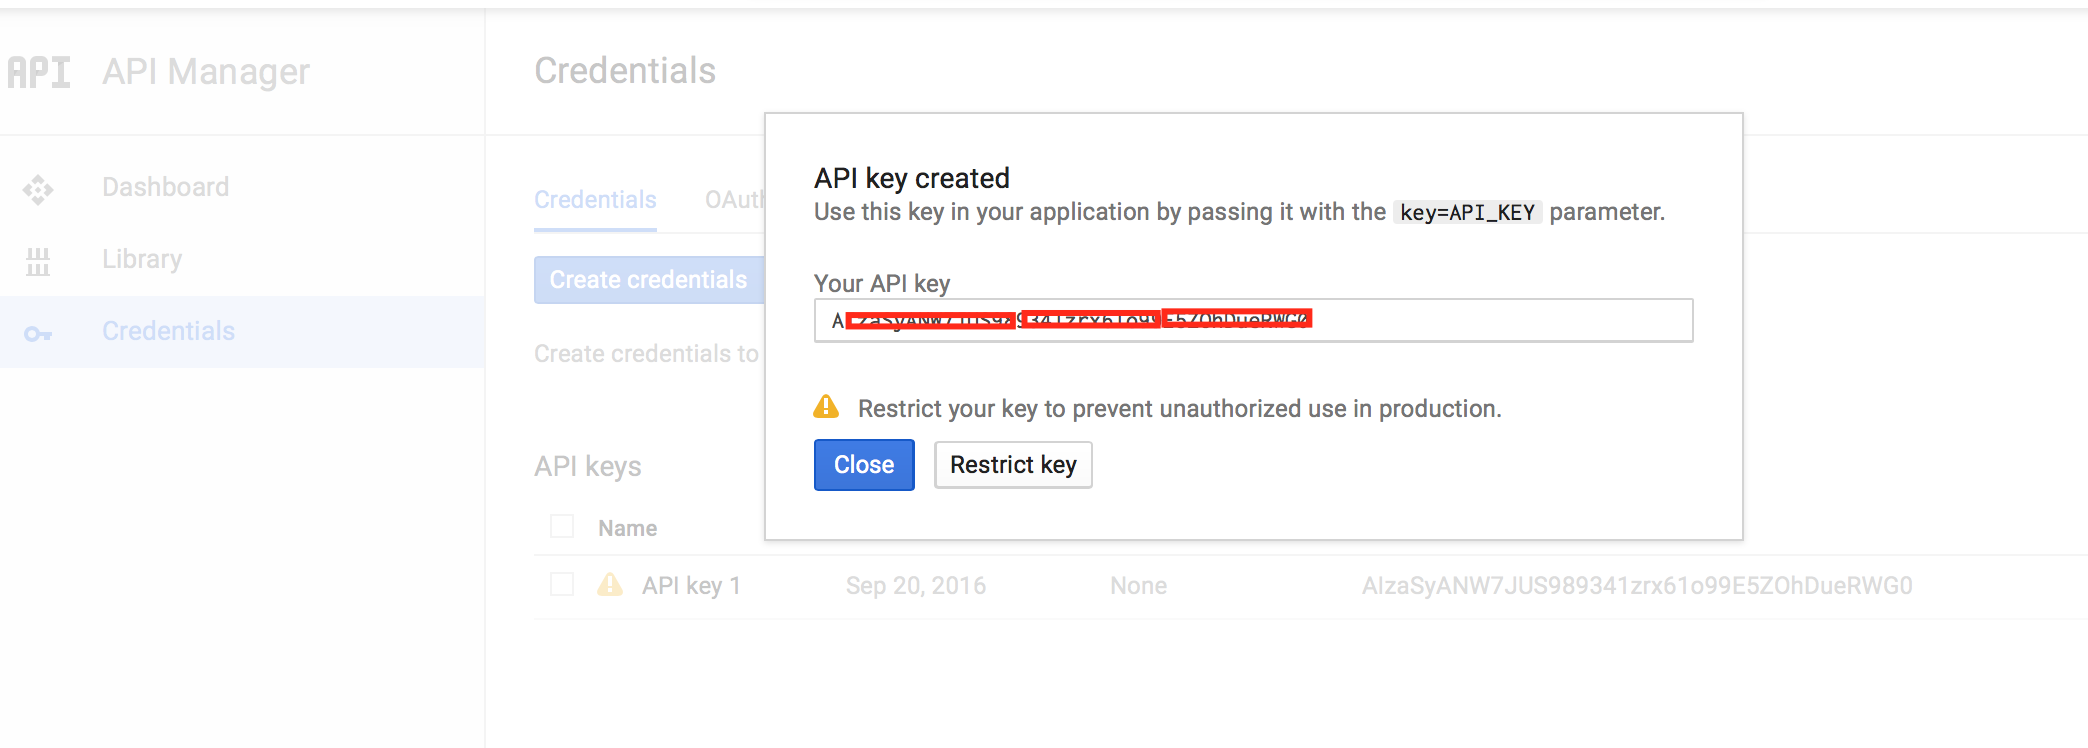
 And here you go! You’ll get the Google API key that you would need to copy and paste into the required field in the Theme Options.
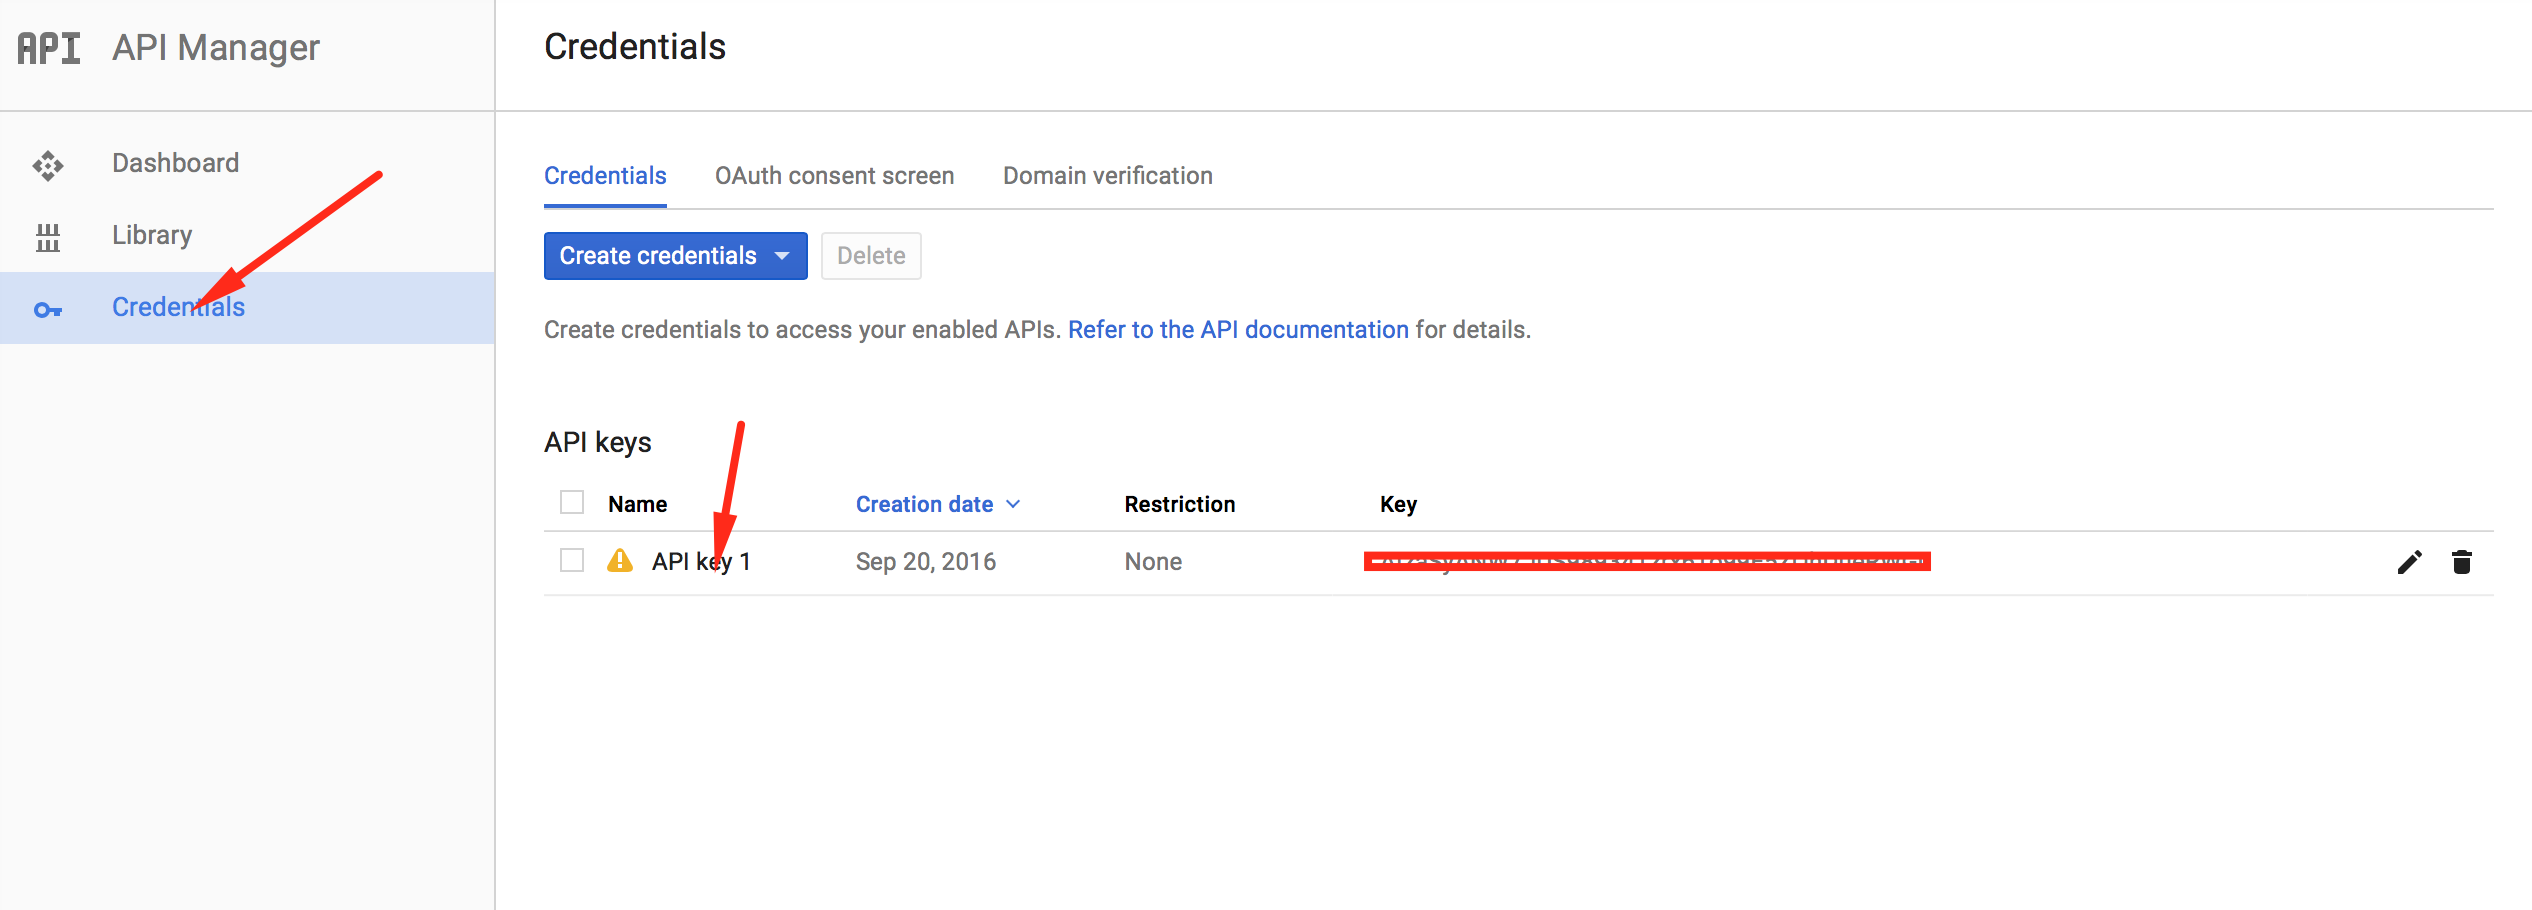
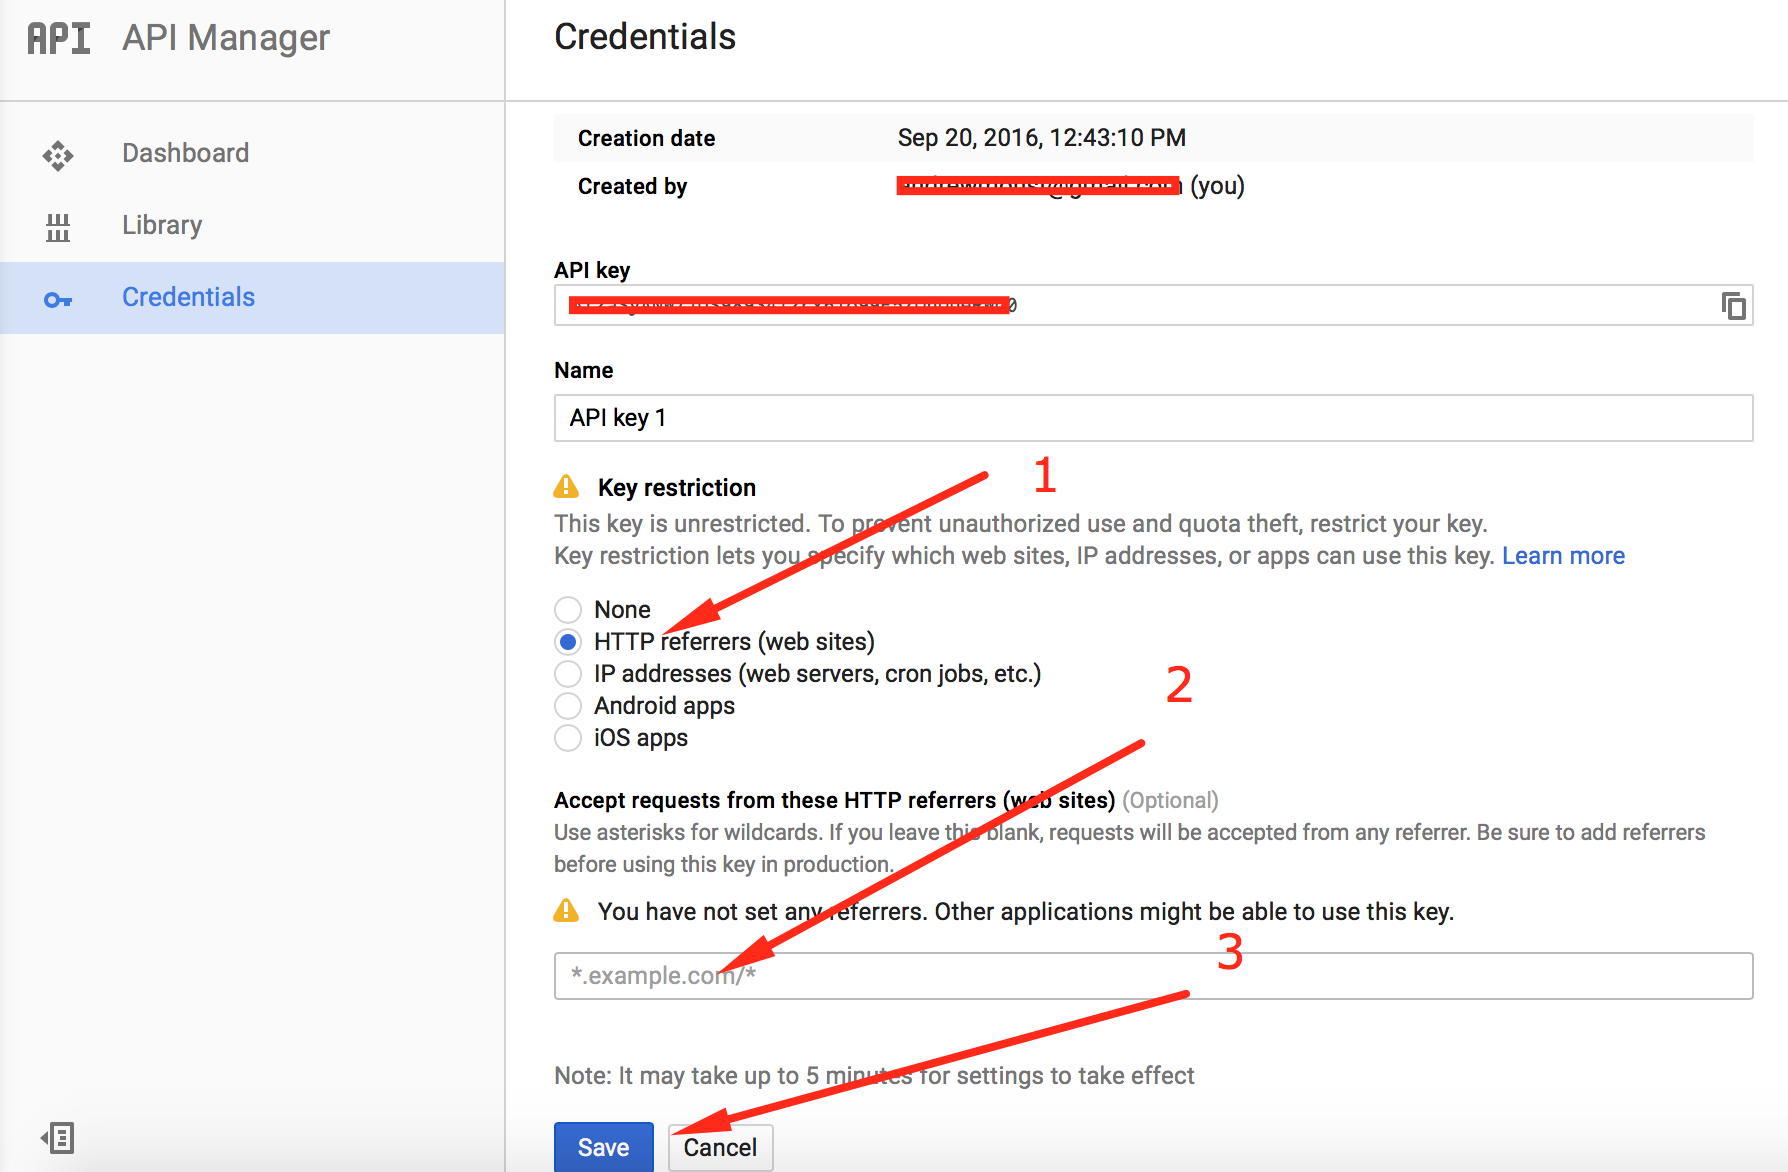
- In order to get the Google Api working properly specifically on your website you would need to do one more thing. Go the Credentials section and click on the Api Key
 You’ll get to the Api key editor and in “Key Restriction” listing you need to check “HTTP preferrers (web sites)”, The additional field will appear bellow for inserting the website URL. You would just need to insert your website URL, and then click save button, And that’s it your API key for google maps will be fully functional and the Google map will be working on your website.
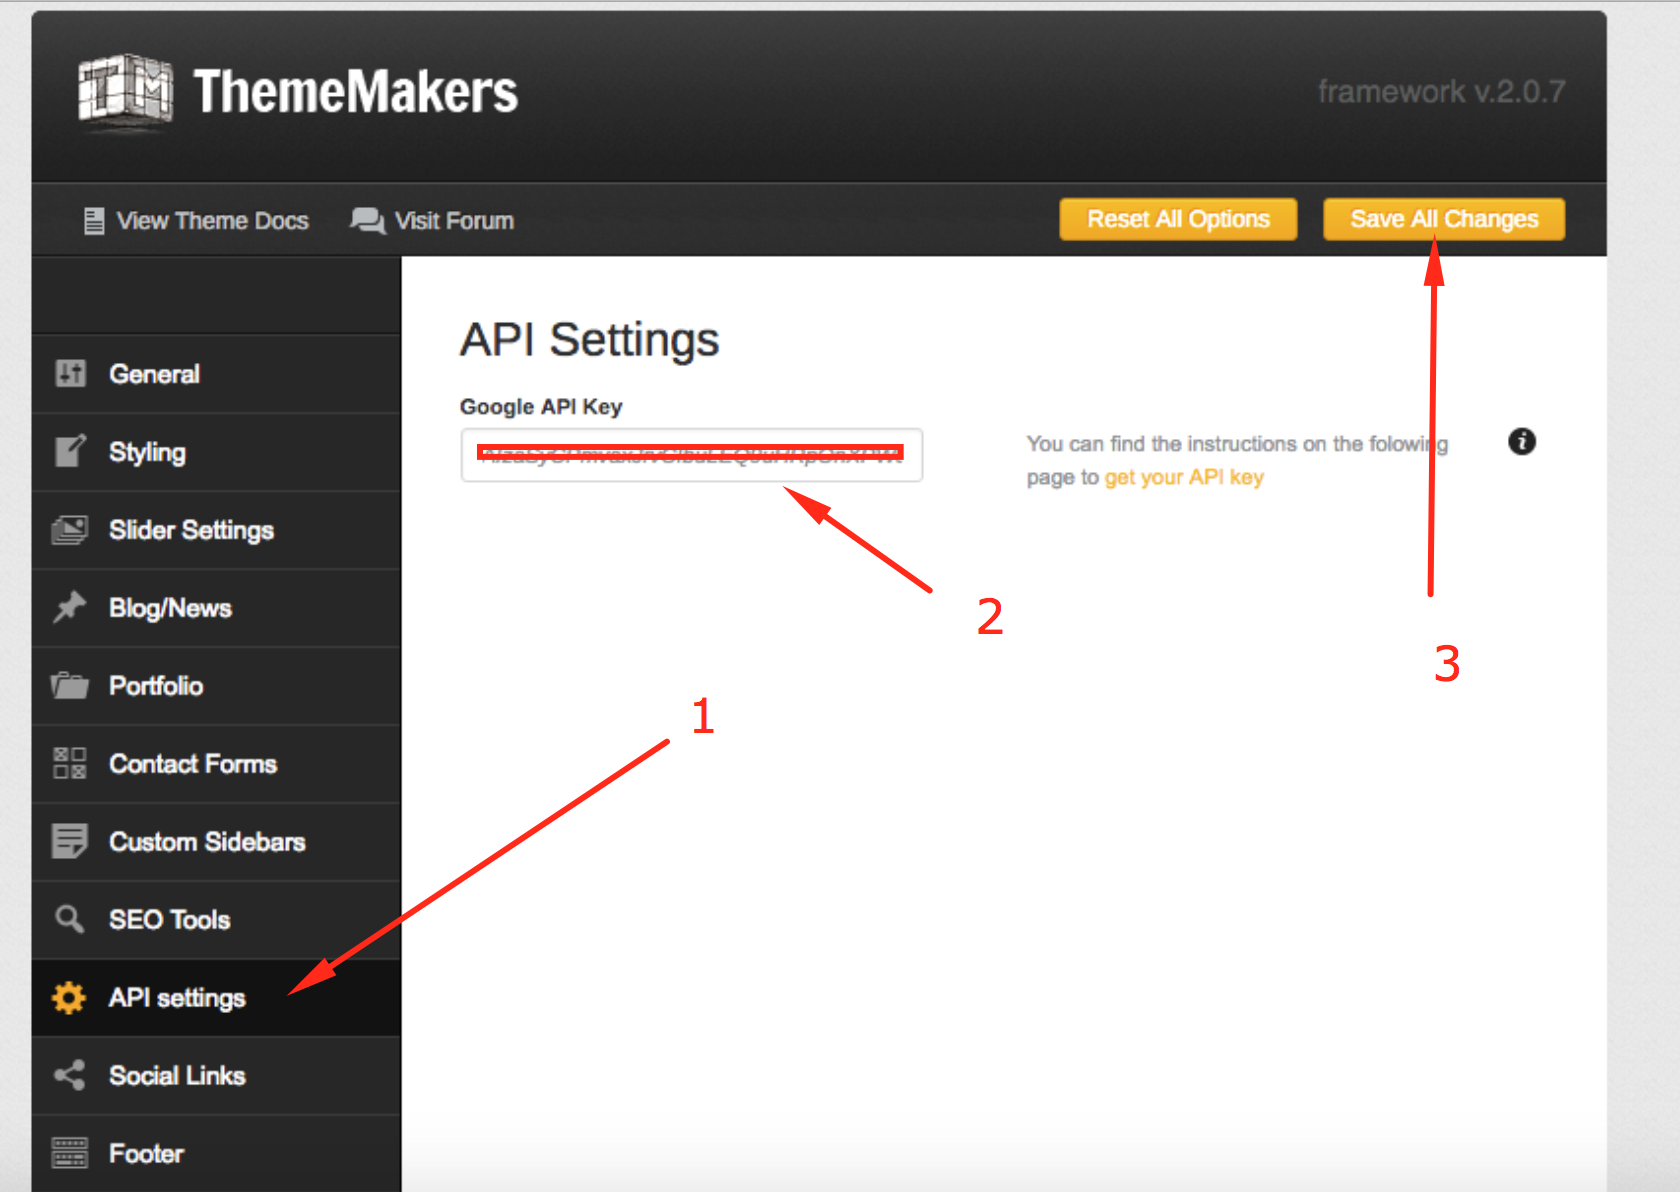
- That’s pretty much it and if you have gone through all this process you would just need to copy the API key, insert it in the Theme Options > Api Settings to a designated field and click “Save All Changes” as shown on this screenshot